Sturdy Edge Units
As their name suggests, Sturdy Edge Units are very sturdy. The additional creases make this unit much stronger than Penultimate Units, but the range of shapes they can form is much more limited. Example models include my Icosahedron and Rhombicuboctahedron.
This unit was independently invented by several people, including Dirk Eisner, Francis Ow, Michał Kosmulski, and Tomoko Fuse.
Base Unit
Materials: Only paper is needed. Start with a sheet of letter-sized paper. Fold one corner diagonally to meet the opposite edge, then cut off the excess to leave the largest possible square. Divide this square into 4 smaller squares; each unit uses one.
Step 1. Fold the paper into quarters in a wavelike pattern, as shown.
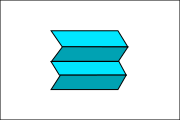
Step 2. Unfold the middle crease, but keep the two sides folded. Place the paper vertically with the flaps on top, as shown.
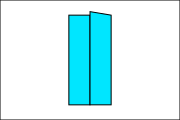
Step 3. Fold the inner edge of the left flap to meet the left edge, and unfold.
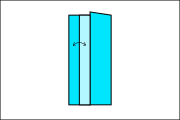
Step 4. Fold the top right triangle to meet the new crease created in Step 3, and unfold.
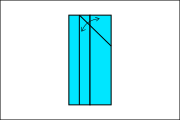
Step 5. Tuck the new triangle inside the paper with an inside reverse fold. This creates the pocket of the unit.
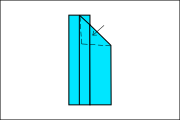
Step 6. Repeat Steps 3-5 for the other side.
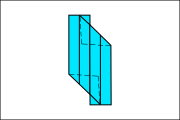
Step 7. Valley fold the entire left half on top of the right.
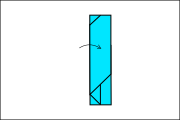
Step 8. Valley fold the top right flap as shown. The new diagonal crease should coincide with the diagonal pocket edge created in Step 5.
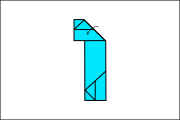
Step 9. Valley fold the small rectangular flap on the left towards the center. The new crease should coincide with the left edge of the piece.
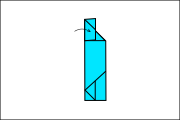
Step 10. Repeat Steps 8-9 for the other side.
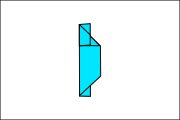
Step 11. Slightly relax the creases created in Steps 7-10 to finish!
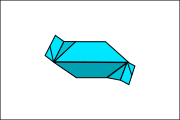
Note: Units created this way will form inward-bulging triangular faces. To make them bulge outwards instead, replace the valley fold in Step 7 with a mountain fold. Steps 8-9 are similar but mirrored.
Assembly
When inserting units, line up the two red-marked parts so they overlap.
An important limitation is that each connection between two units can open to at most 90°, so Sturdy Edge Units can only form square or triangular faces. A hexagonal face is also possible by joining six coplanar triangles, though the result is less neat.
Remember that each Sturdy Edge Unit is an edge of the polyhedron. Feel free to explore the interactive visualizer to better understand polyhedron structures in 3D.
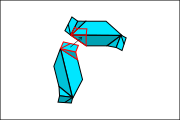
(The visualizer is functional but still under development.)